
I brought navigation and planning together as the relevant resources often overlap. In a bit of a stretch, let me consider the soft ware as gear.
As of 2019, there was 3 CDT-specific map sets and 2 smartphone apps. Then there’s the generic map sets and generic apps that you could adapt. I carried one map set on paper, the others on electronic form, plus the two specific Apps and two other generic ones. Most of my navigation was on the Guthook App, allegedly the most popular.
Map Sets
CDT specific map sets are available from the CDT Coalition, Jonathan Ley and Bear Creek Survey. The CDTC and Jon Ley are a free download even though donations are welcome. You can print them yourself and you can also download the PDF files directly from the Avenza App and use them for navigation. Avenza navigation and map management are not as user friendly as the dedicated apps though. Bear Creek’s are commercial maps that you get for a price. You can get a PDF download or a printed version.
I got the 3 sets on PDF. All have strengths and weaknesses.
CDT Coalition Maps
As of 2019, these maps were on version 2.0, at the time of writing there’s version 3.0 available. I’ll comment on 2.0.
Scale: 1 inch = 1/2 mile or 1:31680

Direction: Northbound
The CDTC maps are the cleanest and easiest to read. While the other sets appear to have just shrunk the US Geological Survey maps to a smaller scale, the Coalition maps apparently went through some re-rendering to adapt the representation to the new scale so you can actually read most of the print.
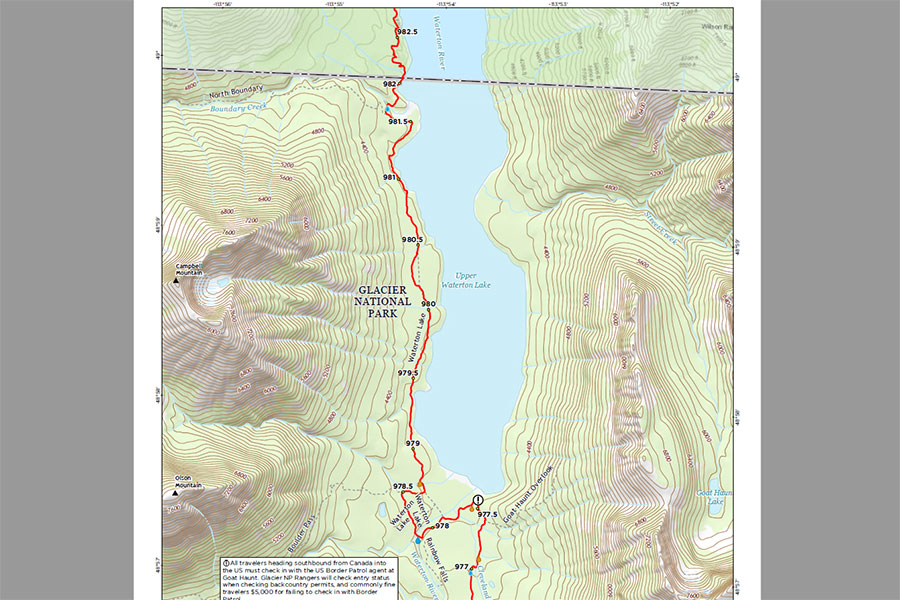
CDT Coalition sample
The tunnel vision effect is acute, the maps show little terrain off the CDT track and you’re bound to miss some visual references sooner or later. The track itself has a marker every half mile and several graphical waypoints, among them the water sources. The maps show a selection of other trails and tracks but I couldn’t tell how thorough this is, I can only guess they’ll show everything that’s in the original USGS maps.
Every sheet includes a matching elevation profile. The sheets are organized into US States, sections and sheet numbers, every sheet is uniquely identified and there’s a key at the beginning of each State showing the sections and sheet numbers within. There is a grid but it’s only drawn on the margins, not across the map and it shows Lat/Lon instead of UTM coordinates.
The CDTC maps are organized South to North and the mileage shown is only Northbound. Mileage resets at state borders and there’s no reference to total mileage once you leave New Mexico.
These were my favorite maps but I didn’t choose them for the printed version because of the lack of a grid drawn across the map, which is important for compass work, the odd choice of Lat/Lon for the coordinates and the Northbound-only focus, being that I was hiking in the opposite direction.
Jon Ley Maps
Scale: 1 inch = 1 mile or 1:63360

Direction: Southbound
Jon Ley has also put together USGS sheets, joining them along the CDT track. They keep the original rendering and I suspect the base maps were a rather old version, you can feel the sheet borders as the rendering sometimes varies and there’s no shaded relief. They’re updated regularly with new, relevant info.
Jon Ley sample
The scale is roughly twice smaller than on the two other sets so the maps show much more terrain, which is often useful for navigation, always pleasing to the eye. The shrinking has been quite dramatic, cramming everything in a smaller space than originally intended. Anything from the USGS originals that uses a small font is barely readable. The author has added some captions of his own for key features. On the desktop screen, you can zoom in and get reasonable detail. I didn’t print these maps so I can’t say how they’d look on A4 paper (or the roughly similar 8.5″ x 11″ the author recommends). The track rendering feels rougher, less detailed than on the other sets. Being USGS maps, other trails are shown.
The sheets are numbered within each State. There’s a set of overview pages with a sheet key.
The maps don’t have any coordinate system. Instead, they show a compass drawn on the map with the center positioned at a known location. You could use these data together with a GPS device to find yourself on the map.
There are waypoints in key locations meant to show the mileage in between. There’s no global mileage reference. The other key map markers are numbered and associated to side notes. These side notes are among the strongest point of the whole collection, the author gives hints about the route from a hiker point of view that you won’t find anywhere else.
The other interesting thing about these maps is the alternate routes. The CDT is not as open and undefined as it used to be but there’s still this cult thing going on about finding your own way and Jon Ley maps cater to this spirit very well. He is an accomplished hiker and mountaineer and provides lots of ideas, big and small, for alternative ways of going through. There are alternates in the other map sets but not as many.
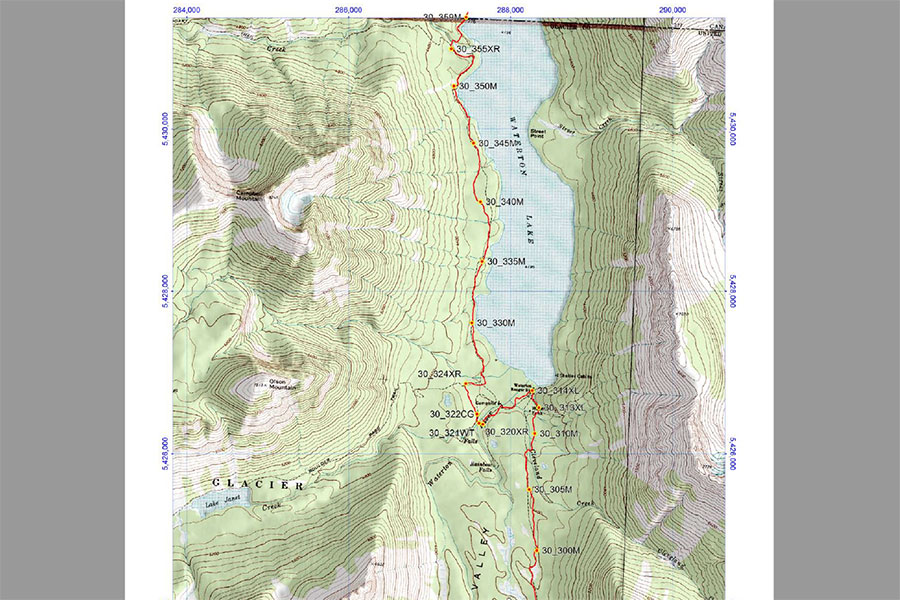
Bear Creek Maps
Scale: 1 inch = 3000 feet or 1:36000

Direction: Northbound
Bear Creek also uses USGS base maps shrunk from the original 1:24000 to the stated 1:36000. As with the Ley maps, the rendering is the original, which makes the Bear Creek maps hard to read in the small print but not as much as Ley’s because the scale is bigger, similar to the CDTC maps. I did print this maps in A4 and the small fonts where very hard to make out.
Bear Creek sample
There are two separate sets, one for the official route and another for all the popular alternates. In the official route, the maps are grouped by US State. The States are divided in segments with several maps per segment. Map numbering is State-wide. The map margin shows map and segment number but it doesn’t show which State the sheet belongs to. This is an important omission and it can make a mess of identifying where a particular sheet belongs.
The Alternates set is classified by alternate route with a varying number of maps within each. There’s no reference in the actual maps to where an alternate joins the official route. The only such cross-reference is in a summary table of the alternates that mentions which sections of the official route each one would take the place of.
If you print these maps, I’d recommend adding all these missing bits, which State the official route sheets belong to and the cross-references between official and alternates.
Bear Creek has printed waypoints with codified key information about water access, trail heads and other useful info. Waypoints also show total northbound mileage. There’s also a UTM grid drawn over the margins and across the map.
Bear Creek maps can be ordered on PDF or on paper. Despite claims from the publisher, I didn’t see a way of using these maps for navigation through a smartphone app. I didn’t see them in the Avenza store. Loading the PDF files manually on the Avenza app didn’t work.
CDTC, Ley or Bear Creek
I got the three sets so I could make an informed decision, all of them on PDF. I wanted to carry paper maps on the trail and decided for Bear Creek. The deciding factor was the UTM grid. The waypoint set was also the best of the three options. I had to swallow the Northbound orientation, once on the trail this was only a minor inconvenience. I printed and carried both sets, official route and alternates.
I had the maps printed professionally following the publisher’s recommendations and the result was fine, albeit heavy.
Bear Creek maps, 2 kg in A4 paperwork
I carried the other two sets in Avenza. Both were easy to find in the app’s store.
Smartphone Apps
A few options here: Guthook, HikerBot, Avenza and any other navigation app of your choice.
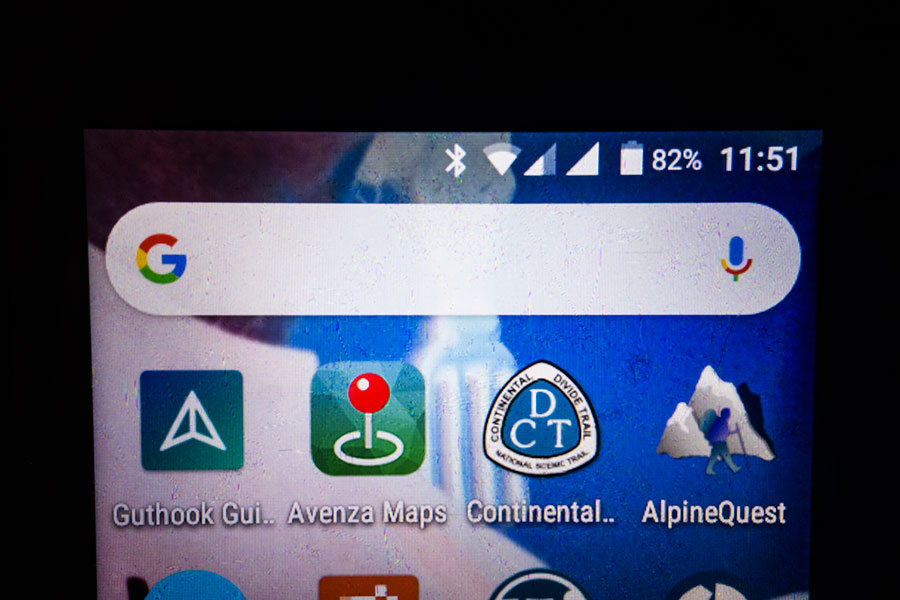
App lineup for the CDT
Guthook
The most popular dedicated App is Guthook. The App itself is free but the state-wide map sets come at a price. One of Guthook’s assets is the user info base, users can leave comments for every waypoint in the App and this proved particularly useful for critical information with seasonal variability like water availability. User info was also nice for campsite selection, particularly in those sections/regions where you can’t take camp spots for granted. It was the only source of campsite info other than checking the topography in the maps.

Guthook look & feel
As of 2019, Guthook was a bit buggy. I needed to re-install the App at some point when it refused to start, luckily I was in town. I heard this happening to at least one other hiker. It’s a bit slow to start and it was often slower to get a GPS fix than the other navigation apps I was using, no idea why or even if this makes any sense at all but it was noticeable enough to grant a mention. The topo maps were rather low resolution and lacked detail even though this might depend on the particular installation, I shared this concern with many hikers but some others had better maps for the same App. Once again, I wonder about this making sense at all. I certainly missed having more detailed maps in this App.
Guthook lets you choose internal or external storage but it apparently doesn’t manage the external well. I tried external for most of the trip but the app turned itself into internal every once in a while. I just needed to switch back, only a minor inconvenience. However, I have the feeling this setting was at the root of the major issue that stopped the app from launching and forced me to reinstall. I switched to internal storage after that.
Other than those issues, the App works well, it’s simple and easy to use and it has some specific, useful features like choosing the direction of travel or the ability to highlight the next waypoint of a certain kind. I always chose to highlight the next water point, which was often the most critical information to structure the day’s hiking. The user input was important, particularly for the water availability in the dry areas so you’d have updated information from previous hikers in front of you or from previous seasons.
HikerBot
My favorite feature in HikerBot was the maps. HikerBot uses U.S. Geological Survey topos with the same quality you get on the paper versions. Every time I needed detail about topography or vegetation, I’d check either the Bear Creek paper maps or HikerBot. The USGS maps also show other trails so it was my only resource to plan for escape routes. HikerBot is crowd sourced, free to download. The map downloads can be free too but the bandwidth is very limited. For a very small fee you get a much better pipe.
HikerBot
I didn’t use HikerBot much so my view is limited. It appears to me as a work in progress. The key waypoint set is not as consistent as in Guthook, HikerBot is missing many. On the other hand, some points have very detailed information that’s proprietary to the App, not user comments. As per my findings, the mileage is only northbound, which makes it odd to navigate in the opposite direction.
Guthook or HikerBot?
Since we’re talking digital, there’s no much question other than the $40 total cost for the former, roughly $10 for a decent download for the latter. I’d say carry both and see for yourself. You’d need to be on the trail to get the full experience though. If I could choose only one, I’d say Guthook is better as a standalone source for hiking the trail.
I also noticed the CDT track available in HikerBot was different from the one in Guthook in some sections. This is very typical as the CDT is itself still a work in progress, there are lots of alternates and the official track keeps shifting often. It seems Guthook keeps updating its track according with the official one from the CDT Coalition. That doesn’t necessarily mean it’s a better track.
Avenza
Avenza is a generic app that works with PDF maps and adds navigation facilities. There is a specific on-line shop within the app to download the available maps from. Both CDTC maps and Ley maps commented above are part of the line-up.
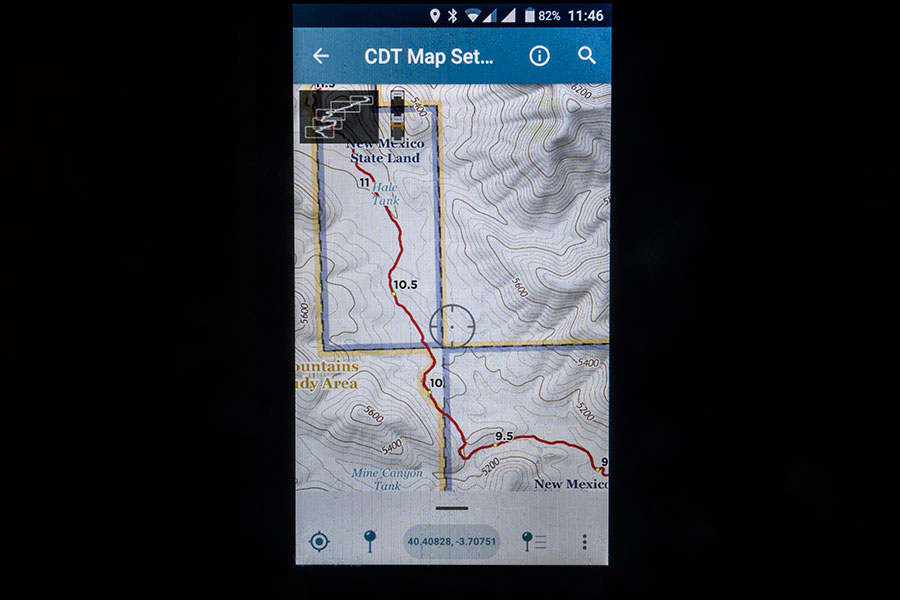
CDTC Maps in Avenza
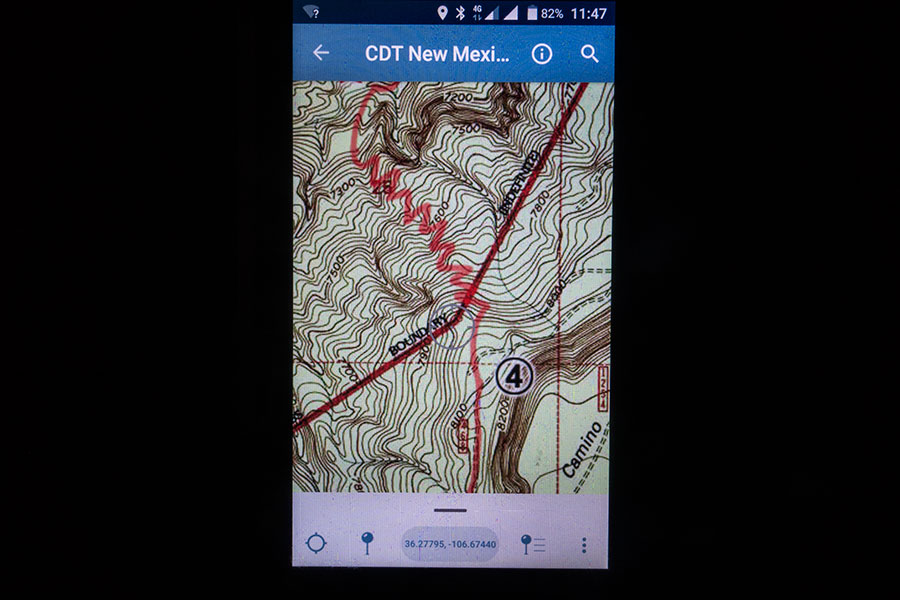
Jon Ley maps in Avenza
As a navigation app, Avenza is very basic. The major drawback is that you need to find out which map sheet belongs to your current location and load it into the navigation interface manually. Whenever your hiking takes you off-map, you need to find the next one yourself, no seamless navigation across map sheets.
Avenza didn’t allow external storage so all maps needed to be in the device internal facility.
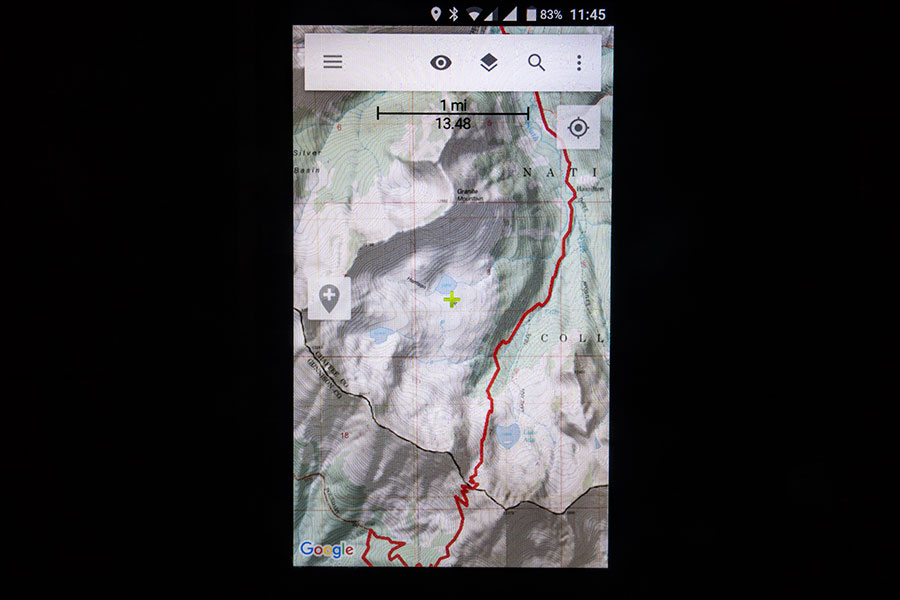
AlpineQuest
AlpineQuest is one of the many navigation apps out there and the one I’ve been using most for some time. Software weights nothing so I decided to download maps for the CDT corridor and allow myself another digital option.

AlpineQuest with OpenTopoMaps
I downloaded maps from OpenTopoMaps. I also downloaded a track file from the CDT Coalition website and uploaded it on the app. Fully ready for navigation.
The OpenTopoMaps have good rendering but they lack any information about vegetation, which is important data, certainly so on the CDT, where you often plan the day’s walk around where the treeline is. The map level of detail available was not consistent, with popular mountaineering areas getting better definition. Trail information was mostly nil. The downloading pipe was extremely poor and it took a long while to get it all.
The track file didn’t have the same level of detail as you could find on the dedicated apps, even though it was allegedly the same file. I probably lost detail somewhere along the process.
I didn’t use AlpineQuest much but I was happy to have it and it was useful at times. It was quicker working than the dedicated apps and sometimes it turned out best for a quick check.
Guidebooks
There are 3 options to my knowledge but I can only speak first hand about the one I actually used, namely Yogi’s CDT Handbook.
Yogi’s CDT Handbook
Yogi’s books are a well known resource among thru-hikers. The CDT book follows the series’ trademark structure with about half the book devoted to background information that you’d leave at home and the other half to town information that you’d typically carry with you on the trail. The book is very well organised from the thru-hiker perspective and it covers most aspects of the thru-hiking experience.
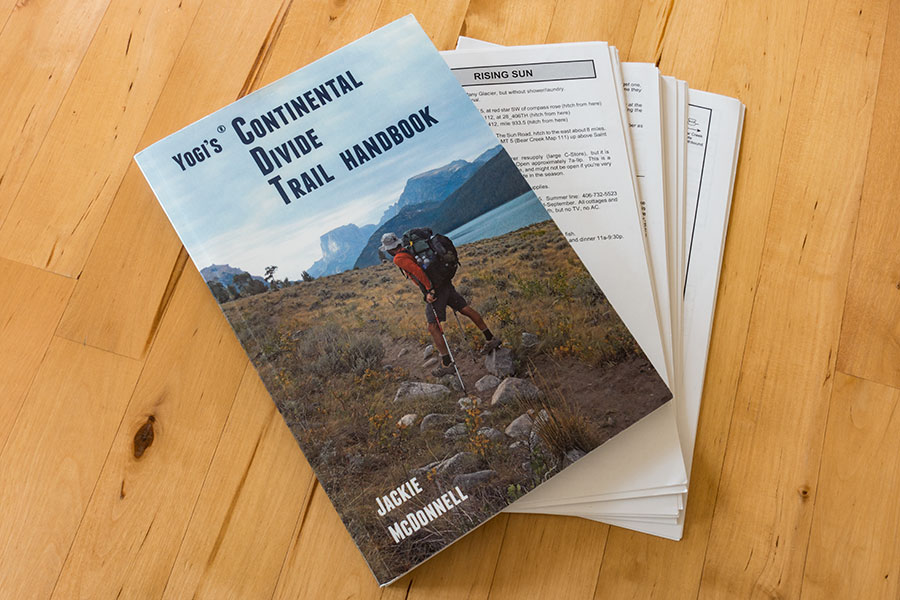
Paperwork to go
You’d need to detach the town info pages from the book to carry them on the trail. I did this, it was an easy job with no damage to the detached pages. The town info has an entry for most of the typical CDT trail towns focused on the services of interest to thru-hikers and including a sketch map for the town. I carried these pages with me on the trail, bundling them up with the paper maps for the bounce box I kept ahead of me on the mail system. I find the information within invaluable for easing your town experience. Part of this info can be found in other sources but none of them gathers it all. As much old fashion as paper could seem in the digital era, I wasn’t the only hiker carrying these in 2019. I’m not aware of a digital version.
Wolf Creek (CDTS’)
The Wolf Guides is a potentially interesting set if only because it’s thru-hiker specific. It’s distributed from the Continental Divide Trail Society (CDTS), whose current activity status I’m not really sure of but the guides seem to be still available.
From the description, this set appears to be self-contained as a do-it-all resource for hiking the trail. It includes overview maps whose level of detail I ignore.
Another interesting resource from the CDTS website is a set of fully detailed topo maps to hike the trail, put together from existing commercial map sets including National Geographic maps, US Forest Service maps and Earthwalk maps, this latter series unknown to me.
Westcliffe (CDTA’s)
The Westcliffe Publishers Guides used to hold the Official status for CDT guidebooks but they now seem to be out of print and nor the editorial neither the sponsoring agency, the Continental Divide Trail Alliance (CDTA) seem to be in business anymore. The books can still be found on sale though. I still have one of them purchased long ago.
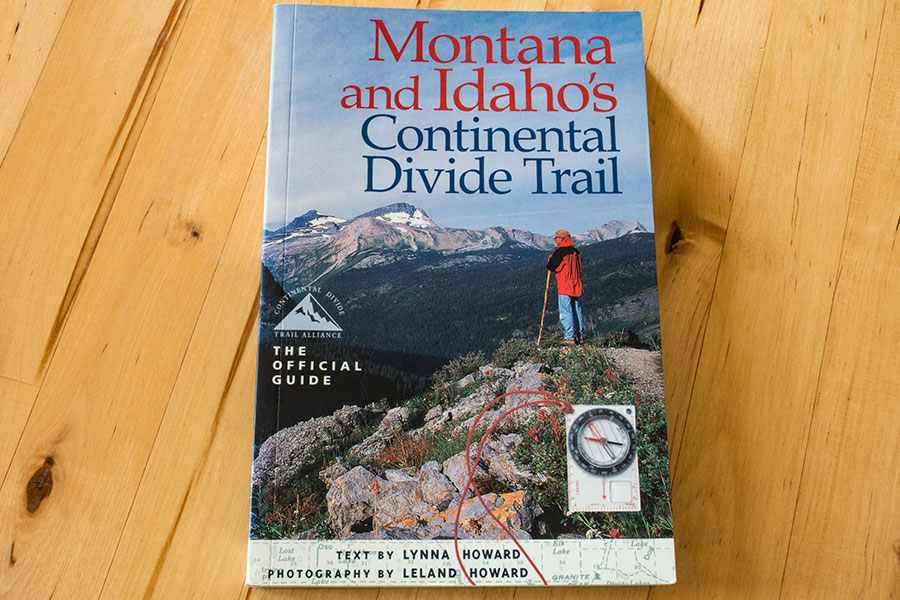
Vintage book
This particular item is the most typical of guidebooks, aimed for thru and section hikers alike but I guess the day-by-day trail description is more information than a thru-hiker would like to carry. The book includes topo maps that might be enough to hike the trail but offer a extreme in tunnel vision. I can imagine the rest of the books in the series will be similar.
On-line resources
Navigating the web and actually finding what you need can be tough. I didn’t do much research and there’ll definitely be many useful planning resources that I missed but I still used a couple of them.
CDTC
The Continental Divide Trail Coalition is the current working organization advocating for the trail and the obvious first place to go the day you start dreaming about hiking the CDT. Its website is actually a good resource, it has a useful planning section with a PDF planning guide that you should probably go through before anything else. It has lots of information on background, logistics, navigation or ethics and it gathers in one place the always elusive info about hiking permits, wherever they apply. Do start from here.
There’s also the topo maps discussed above, a downloadable track, the famous water report and many beautiful pics to wet your appetite for the trail.
Halfway Anywhere
Halfway Anywhere is himself a hiker. His website is great in many accounts and it stands out at the planning stage for his great work with the thru-hiker surveys he’s been running since 2017 for the CDT. He’s then put together all the data into some great articles about key issues like resupply strategy or gear and other interesting aspects like demographics or the very thru-hikers’ own demons.
What I missed (badly)
I found the resources fine once on the trail. At the planning stages, however, I badly missed some kind of graphic overview on the route that would include the road crossings, town access options and a thorough cross reference with the topo maps and guidebooks. I think such a resource would have helped immensely during the initial stages of planning. I too often found myself fighting references I couldn’t locate, the topo maps were too detailed for this and navigating them was a royal pain, plus the roads were often poorly depicted and difficult to locate.
The CDTC leaflet is probably the closest I could find to this idea but it lacked detail to be of real use for planning:
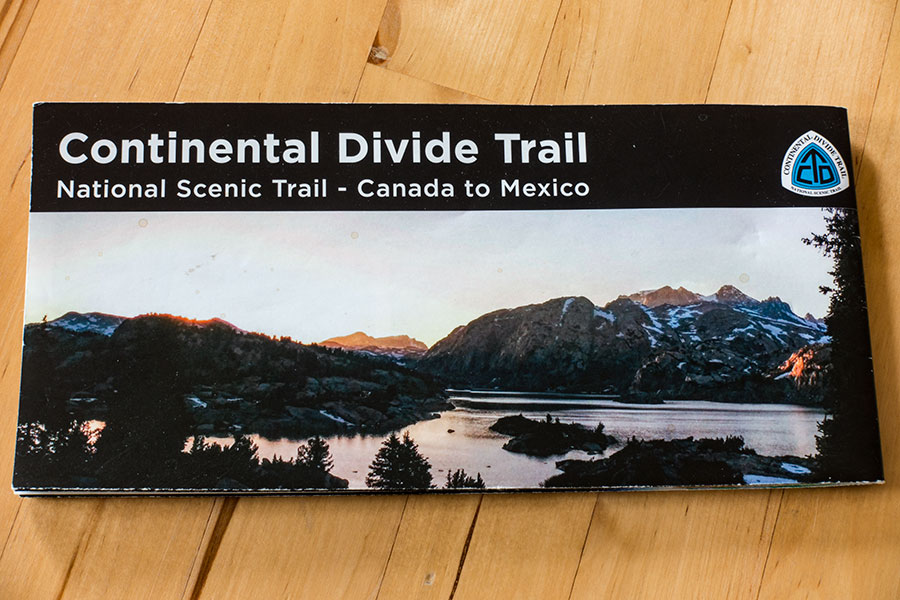
CDTC leaflet
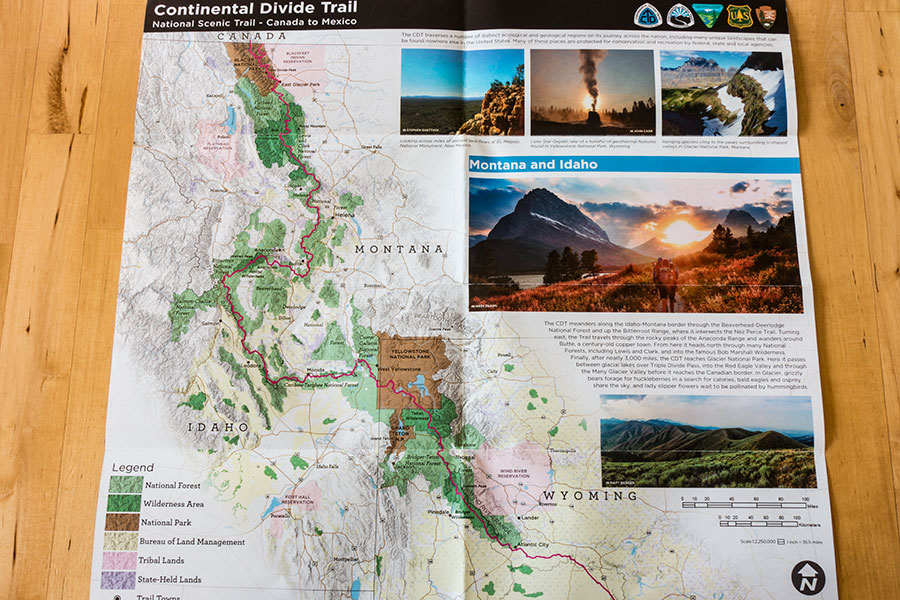
Montana, Idaho & Wyoming
Such a resource would have made my planning stages much easier and I can imagine it’d be the kind of map I could keep staring at now just for the beauty of it.
The Devices
These are some of the characters I had a closest relation with during the trip. You can’t get real lonely on the trail when you have these guys to talk to.
Smartphone
Crosscall Trekker M1 Core
This is meant to be an outdoor worthy smartphone: rugged build, water resistant, big battery. By 2019, it was already 2 years old. That’s almost too old in technology and a field with the highest rotation but by the time I set off for the CDT it was still usable and it’d still look cool enough.
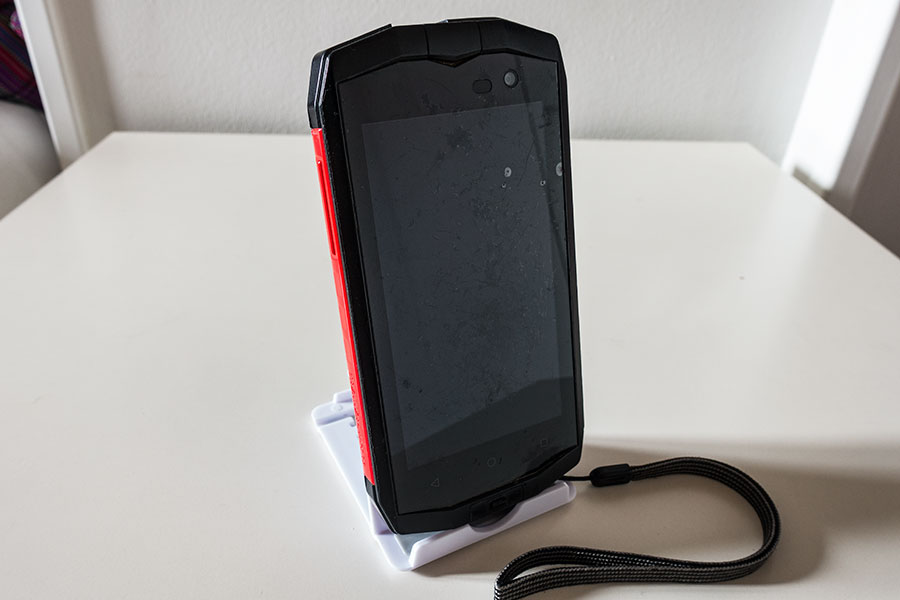
Dented screen
The battery is surely not what it used to be. It’s not user replaceable. I considered getting a new one before the trip and contacted the manufacturer about it but I didn’t get an answer and eventually let the idea go.
The other outstanding sign of age is not about decreased performance, rather about old design. Internal storage in this phone is insufficient even for present urban needs, go figure about outdoor stuff with its huge info base. I got a big micro-SD card where I shifted everything I could but not all apps allow external storage and, as commented above, I have the feeling that not all that do can manage it well. I had to strip the smartphone app line-up to just the most basic beyond the outdoor things.
The Crosscall lived on my pants pocket for the length of the trip. It worked fine and gave me no problems that I could blame it for. I dropped it at least once and it got a few dents in the screen that went little way beyond cosmetic. I appreciated having the lanyard option every time I was handling the device in questionable terrain. The screen works poorly in wet conditions despite manufacturer claims but I already knew that.
It is debatable whether outdoorsy smartphones perform any better than normal, urban ones with a protective case. Most hikers seem to be using their everyday phones for the trail.
Wristwatch
Quechua Geonaute 700
This is a simple wrist device, just time, altimeter and compass functions. It almost feels old school now but I like it that way. Time and altitude are two specific data bits that I check regularly and having them available on my wrist spares me producing the smartphone so often and helps with actually checking as often as needed. Altitude is not as important when navigation is mainly on GPS though.
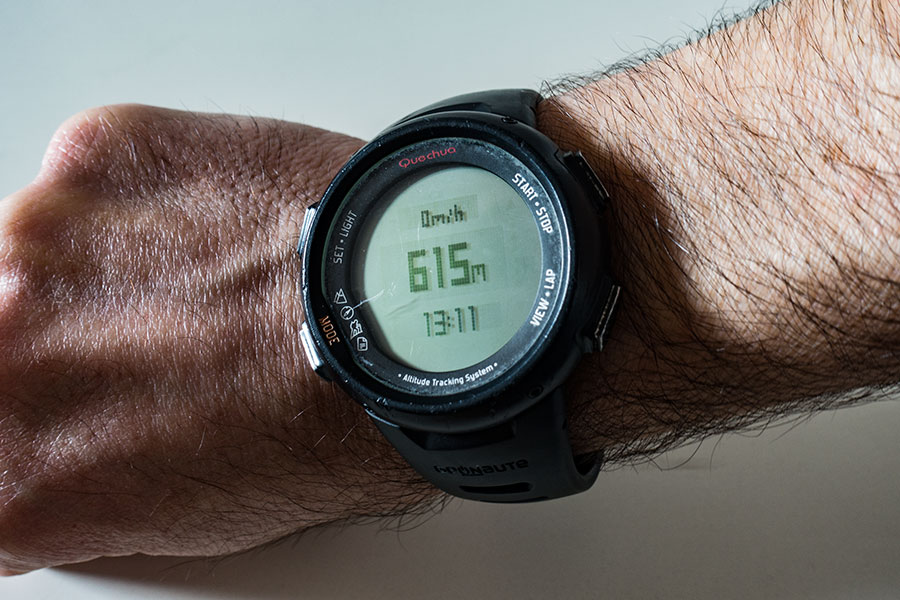
Altitude and time
The big thing about such a simple device is that a single CR-232 battery will outlast the trip. One less thing to worry about when everything you want to think of is the trail.
Compass
Recta DS 40
Poor compass didn’t have much chance to play on this trip but I wouldn’t like to be out without one.
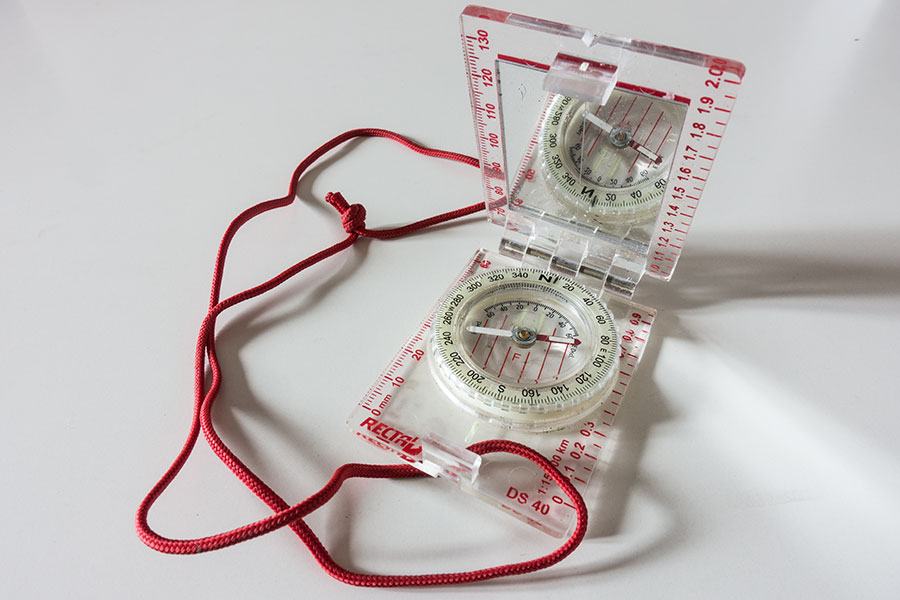
With mirror
I like this model for the compact design, long base plate when fully deployed and the included mirror. The rotating bezel works smoothly enough. It has no declination correction but that’s something I prefer to do manually anyway.
I hardly, if ever, need to use the mirror for accuracy but it’s important to carry one when you’re on your own.
 RSS – Posts
Say what you want